
Preview:
Toxic Waste Text Effect.
Step 1:
Let’s start out by creating a new file. I used a 500×500 pixels canvas set at 72dpi, and I filled my background with black color. Now make a new layer set and name it 'Text Design'. Then select the Horizontal Type Tool then set the font family to Verdana, bold italic, 72 pt, smooth and #F80000 color shade. In a new text layer type your name.

Step 2:
Under Layer Style(Layer > Layer Style) add an Inner Glow blending option to your red text layer.
Result:

Step 3:
Duplicate your red text layer and remove the Inner Glow layer style. Then change the color to a green shade, #46D649 and nudge it to the left by a couple of pixels.

Step 4:
Now merge down the 'Text Design' layer set through Layer > Merge Layer Set. Then under Layer Style(Layer > Layer Style) add an Inner Glow blending option.
Result:

Step 5:
Create a new layer and duplicate your text design layer, merge them both so the layer style settings attached with the text design layer becomes permanent. Now go to Image > Adjustments > Desaturate, this will turn the text design copy to gray. Then go to Filter > Blur > Gaussian Blur, use the setting below.
Result:

Step 6:
Now move up the gray text design layer by a couple of pixels. Then under Layer Style(Layer > Layer Style) add an Inner Glow blending option. Then set the layer's opacity level to 76%.
Result:

Step 7:
Make a new layer set and name it 'Green Glow'. Then in a new layer draw a small white circle with 16 x 16 px dimensions.

Step 8:
Under Layer Style(Layer > Layer Style) add an Inner Glow and Gradient Overlay blending options to the light blue circle layer.
Result:

Step 9:
Duplicate the glowing green circle design and resize it down by a couple of pixels. Do this twice as shown below.
Step 10:
Use the 'Green Glow' layer set design to decorate your text design. Just keep duplicating the layer set and position them all over the text.
Step 11:
Once you have enough green glow designs on text design, turn off the background visibility so its transparent. Then add a marquee selection around the green glow designs and copy merged through Edit. Paste what you copied into the canvas.
Step 12:
Now go to Filter > Distort > Wave, use the settings below or play use your own settings.
Result:
Step 13:
Now turn off the background visibility again and copy merged the entire text design. Then apply a Plastic Wrap effect through Filter > Artistic, use the settings below.
Result:
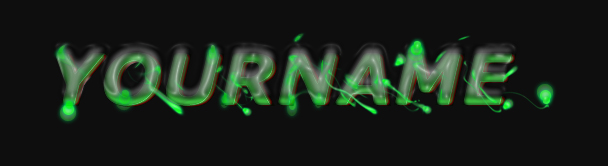
Results:
Toxic Waste Text Effect.