
Preview:
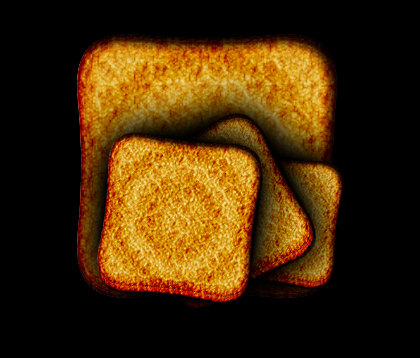
Burned Toast Design.
Step 1:
Let’s start out by creating a new file. I used a 500×500 pixels canvas set at 72dpi, and I filled my background with black. Now make a new layer set and name it 'Burned Toast'. then select the Polygon Tool, set the sides setting on the option window to 4 and under the polygon options use the settings below.
Create a layer then draw a brown polygon with #DCB363 color shade and 260 x 260 px dimensions.
Step 2:
Under Layer Style(Layer > Layer Style) add an Inner Glow and Pattern Overlay blending options to the brown polygon layer.
Result:
Step 3:
In a new layer add a white colored polygon with the same size as the brown polygon.
Step 4:
Under Layer Style(Layer > Layer Style) add an Inner Glow and Pattern Overlay blending options to the white polygon layer. Then set the layer's blending mode to Darken.

Result:
Step 5:
Duplicate your 'Burned Toast' layer set and merge it through Layer > Merge Layer Set. Now apply a Plastic Wrap effect through Filter > Artistic > Plastic Wrap, use the settings below.
Result:
Step 6:
Now set the Burned Toast layer's blending mode to Hard Light at 58% opacity level. Then nudge down the burned toast design layer by 4 pixels and place it inside the original 'Burned Toast' layer set.
Step 7:
Highlight the 'Burned Toast' layer set on your Layers window and merge it through Layer > Merge Layer Set. Then under Layer Style(Layer > Layer Style) add an Inner Shadow and Inner Glow blending options.
Result:
Results:
Burned Toast Design.