
Preview:
Air Combat Theme Navigation Interface Design.

Step 1:
Let’s start out by creating a new file. I used a 800 x 250 pixels canvas set at 72dpi, and I filled my background with #768B9E color shade. In a new layer draw a large rectangle with 800 x 145 px dimensions and the same color as your background.

Step 2:
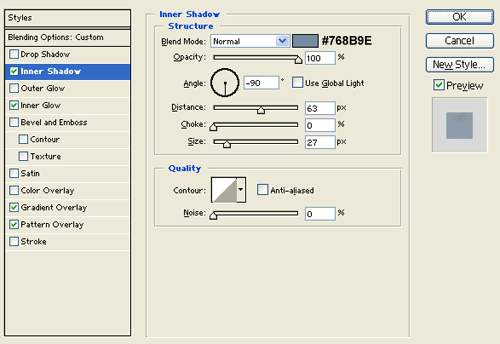
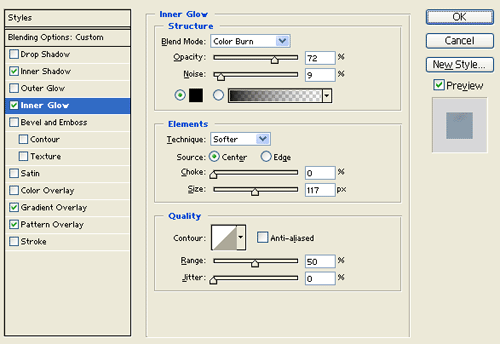
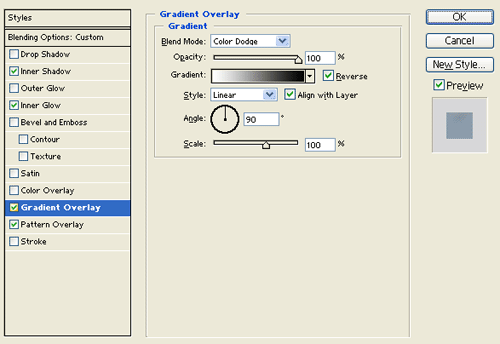
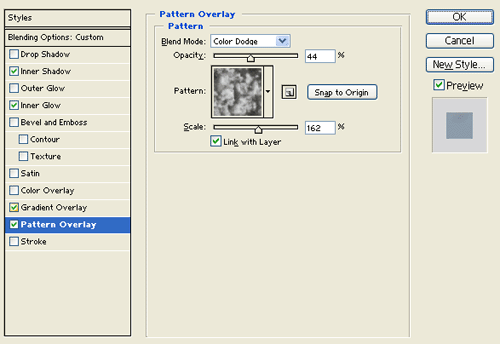
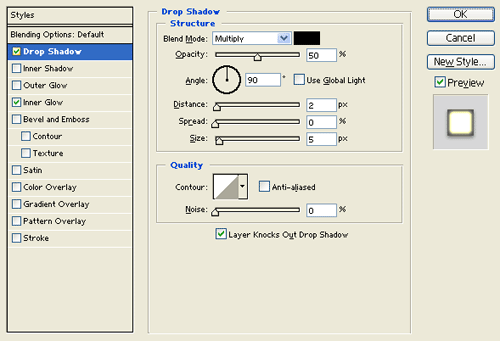
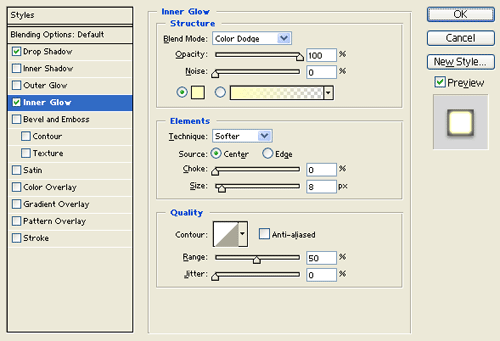
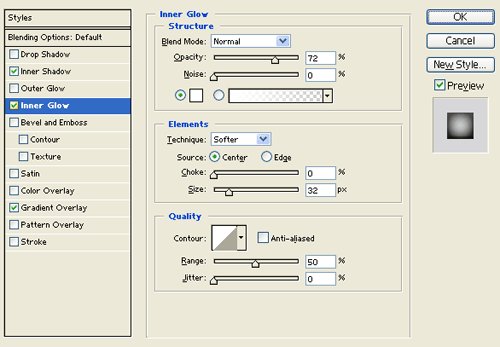
Under Layer Style(Layer > Layer Style) add an Inner Shadow, Inner Glow, Gradient Overlay and Pattern Overlay blending options to the large rectangle layer.
Result:

Step 3:
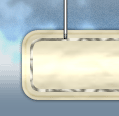
In a new layer draw a large light brown rounded rectangle with #DFD3A1 color shade and 705 x 70 px dimensions.

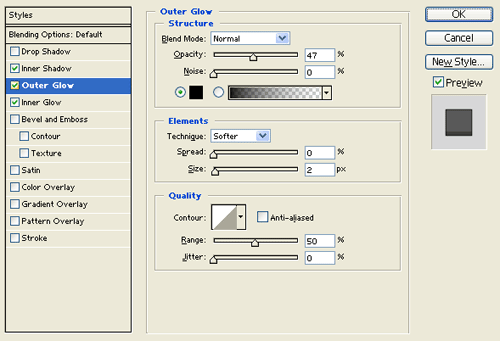
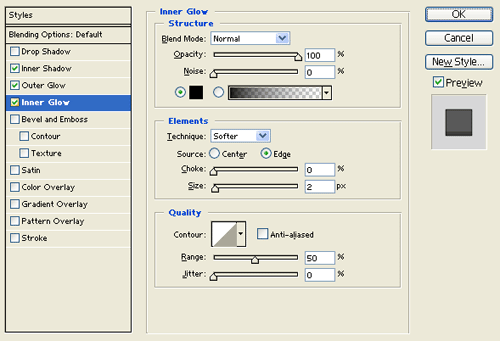
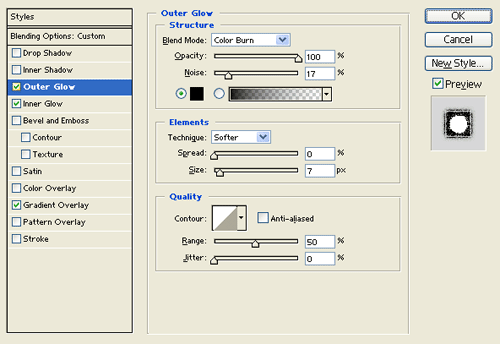
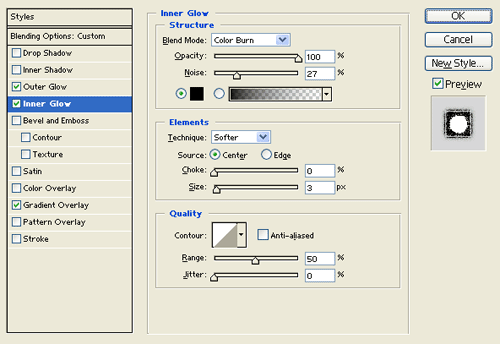
Step 4:
Under Layer Style(Layer > Layer Style) add an Outer Glow, Inner Glow, Gradient Overlay and Pattern Overlay blending options to the large light brown rounded rectangle layer.
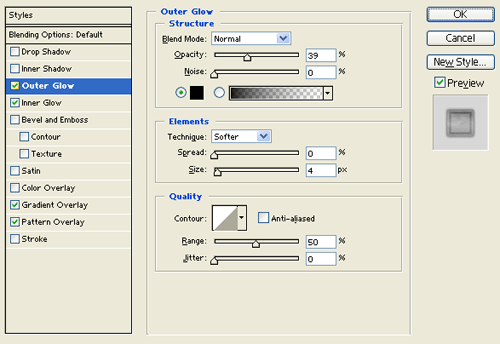
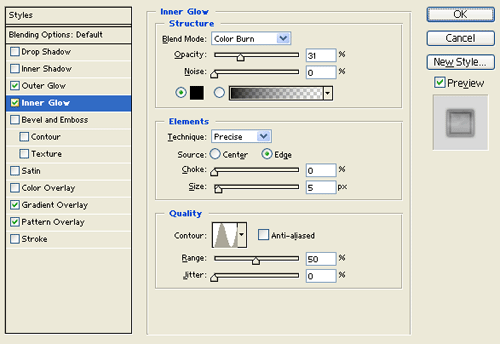
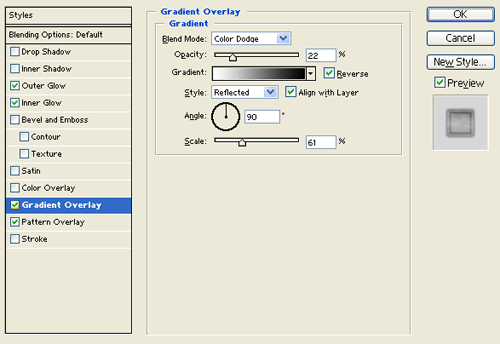
Pattern:

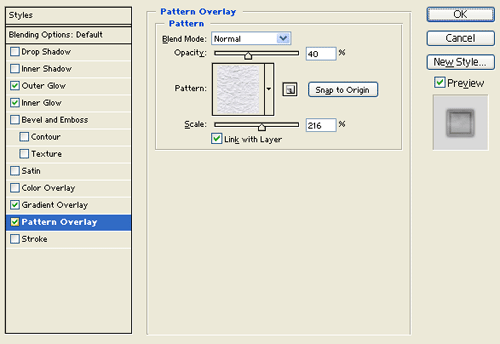
Result:

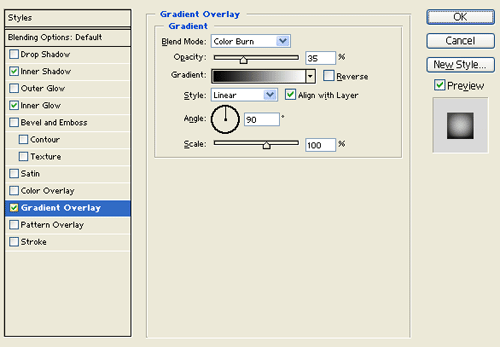
Step 5:
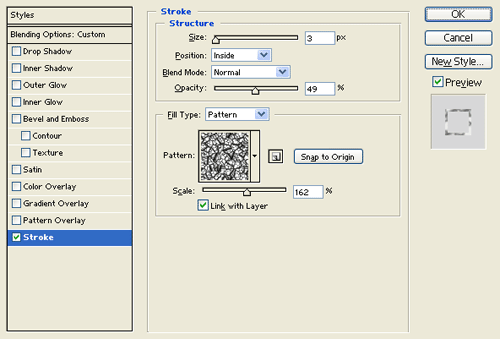
In a new layer draw a large black rounded rectangle with 689 x 54 px dimensions.

Step 6:
Under Layer Style(Layer > Layer Style) add a Stroke blending option to the large black rounded rectangle layer. Then set the layer's blending mode to Lighten.
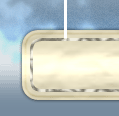
Result:

Step 7:
In a new layer draw a thick white vertical line with 3 x 73 px dimensions.
Step 8:
Under Layer Style(Layer > Layer Style) add an Inner Shadow, Outer Glow and Inner Glow blending options to the thick white vertical line layer.

Result:
Step 9:
Duplicate the white vertical line design layer and position it on the other end of the rounded rectangle design. Then add a simple search box feature on the right end side. Now select the Horizontal Type Tool, set the font family to Arial, Bold, 30 pt, smooth and #5880A3 color shade. In a new text layer type your website name on the left end side of the interface design.

Step 10:
Under Layer Style(Layer > Layer Style) add a Drop Shadow and Inner Glow blending options to your website name text layer.
Result:

Step 11:
Make a new layer set and name it 'Button'. In a new layer draw a gray rounded rectangle with #7B7B7B color shade and 87 x 30 px dimensions. Then cut the top rounded corners of the gray rounded rectangle.

Step 12:
Under Layer Style(Layer > Layer Style) add an Inner Shadow, Inner Glow and Gradient Overlay blending options to the gray button layer.

Result:

Step 13:
Select the Horizontal Type Tool, set the font family to Arial, Bold, 11 pt, none and #7AB1CE color shade. In a new text layer type your first navigation link on the gray button. Then add the rest of your links with its own button design.

Step 14:
In a new layer draw a small black circle with 14 x 14 px dimensions on the rounded rectangle design.

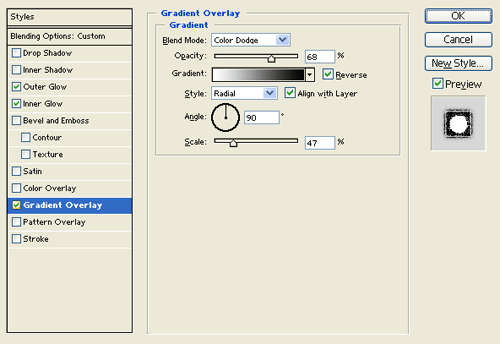
Step 15:
Under Layer Style(Layer > Layer Style) add an Outer Glow, Inner Glow and Gradient Overlay blending options to the small black circle layer. Then set the layer's blending mode to Lighten.
Result:

Step 16:
Now add more bullet holes by duplicating the black circle design layer from the last step. Finish it off with some military graphics on the interface.
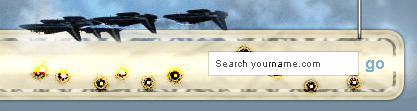
Results:
Air Combat Theme Navigation Interface Design.