
Preview:
Nature Theme Text Effect.

Step 1:
Let’s start out by creating a new file. I used a 500×200 pixels canvas set at 72dpi, and I filled my background with black color. Now select the Horizontal Type Tool then set the font family to Berlin Sans FB, bold, 90 pt, smooth and #31130B color shade. In a new text layer type your website name.

Step 2:
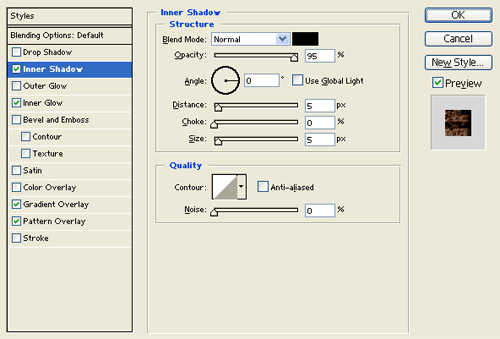
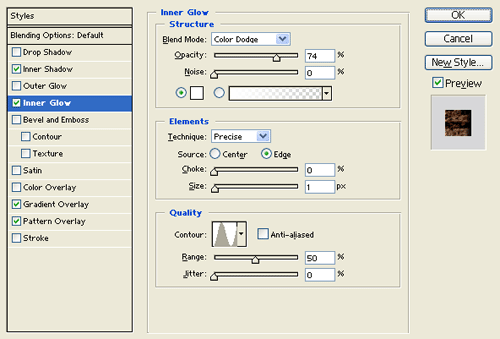
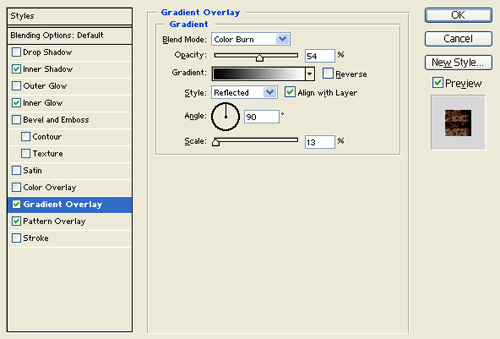
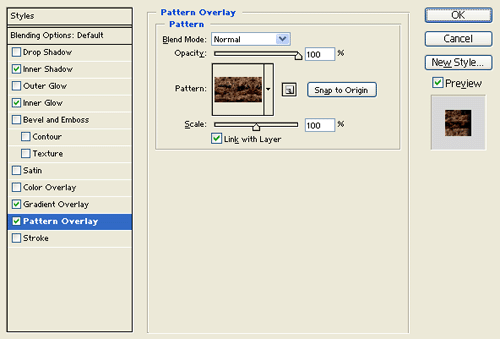
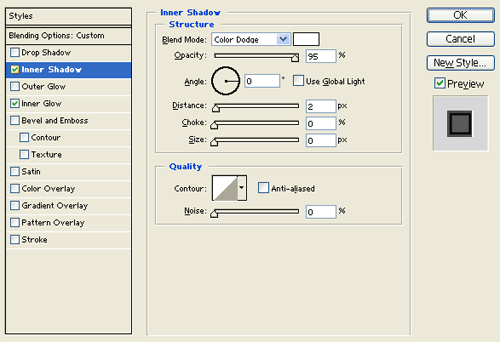
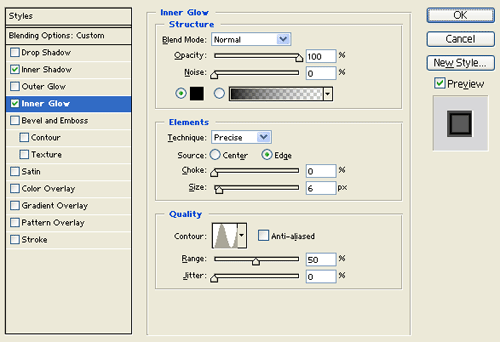
Under Layer Style(Layer > Layer Style) add an Inner Shadow, Inner Glow, Gradient Overlay and Pattern Overlay blending options to your brown text layer.
Result:

Step 3:
Now grab the leaf design here and insert it into your canvas.

Step 4:
Use the leaf design layer and decorate your text as shown below. Add different sizes of the leaf in different positions and rotations.

Step 5:
Keep decorating the text design with the leaf.

Step 6:
In a new text layer type out your website name with a white color.

Step 7:
Under Layer Style(Layer > Layer Style) add an Inner Shadow and Inner Glow blending options to the white text layer. Then set the layer's blending mode to Darken.
Result:

Results:
Nature Theme Text Effect.